折れ線グラフ表示

Pandasのデータフレームにデータを読み込んでおくとMatplotlibで簡単にグラフを描けます。

1
2
3
4
5
6
7
8
9
10
import os
import pandas as pd
from bokeh.io import output_notebook

base_url = 'https://raw.githubusercontent.com/practical-jupyter/sample-data/master/anime/'
csv_data = os.path.join(base_url, 'anime_stock_returns.csv')
df = pd.read_csv(csv_data, index_col=0, parse_dates=['Date'])
output_notebook() # 出力先をNotebook上にする

df.plot.line() # matplotlibでグラフ表示

[結果]
Matplotlibでグラフ表示

pandas_bokehというパッケージをインストールしておくと同じように簡単にBokehでグラフを描けます。
まず次のパッケージをインストールしておきます。

1
!pip install pandas_bokeh

コードとしてはpandas_bokehをimportしてplot関数をplot_bokeh関数に置き換えるだけとなります。

1
2
3
4
5
6
7
8
9
10
11
12
import os
import pandas as pd
import pandas_bokeh # 追加
from bokeh.io import output_notebook

base_url = 'https://raw.githubusercontent.com/practical-jupyter/sample-data/master/anime/'
csv_data = os.path.join(base_url, 'anime_stock_returns.csv')
df = pd.read_csv(csv_data, index_col=0, parse_dates=['Date'])
output_notebook() # 出力先をNotebook上にする

#df.plot.line() # コメントアウト
df.plot_bokeh(figsize=(800, 450)) # 追加

[結果]
Bokehでグラフ表示
こんな少ないコード量でこれだけのグラフを描けるのは素晴らしいと思います。

(Google Colaboratoryで動作確認しています。)

chainer-goghでAI画像作成

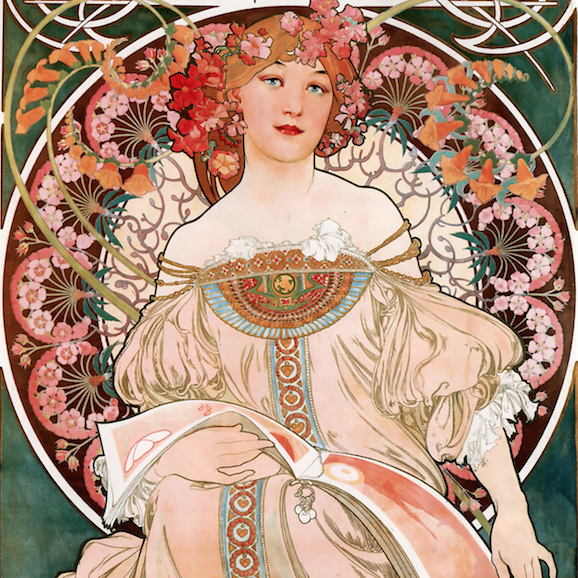
chainer-goghを使ってある画像をスタイル画像に合わせて合成してみます。
(結構時間がかかります・・・)

まず、作成する画像を出力するディレクトリを作成しておきます。

1
!mkdir result

次に画像合成に必要な関数を定義します。

1
2
3
4
5
6
7
8
9
10
11
12
13
14
15
16
17
18
19
20
21
22
23
24
25
26
27
28
29
30
31
32
33
34
35
36
37
38
39
40
41
42
43
44
45
46
47
48
49
50
51
52
53
54
55
56
57
58
59
60
61
62
63
64
65
66
67
68
69
70
71
72
73
74
75
76
77
78
79
80
81
82
83
84
85
86
87
88
89
90
91
92
93
94
95
96
97
98
99
100
101
102
103
104
105
106
107
108
109
110
111
112
113
114
115
116
117
118
import chainer
from chainer import cuda
import chainer.functions as F
from chainer.links import caffe
from chainer import Variable, optimizers

class NIN:
def __init__(self, fn="nin_imagenet.caffemodel", alpha=[0,0,1,1], beta=[1,1,1,1]):
print ("load model... %s"%fn)
self.model = caffe.CaffeFunction(fn)
self.alpha = alpha
self.beta = beta
def forward(self, x):
y0 = F.relu(self.model.conv1(x))
y1 = self.model.cccp2(F.relu(self.model.cccp1(y0)))
x1 = F.relu(self.model.conv2(F.average_pooling_2d(F.relu(y1), 3, stride=2)))
y2 = self.model.cccp4(F.relu(self.model.cccp3(x1)))
x2 = F.relu(self.model.conv3(F.average_pooling_2d(F.relu(y2), 3, stride=2)))
y3 = self.model.cccp6(F.relu(self.model.cccp5(x2)))
x3 = F.relu(getattr(self.model,"conv4-1024")(F.dropout(F.average_pooling_2d(F.relu(y3), 3, stride=2))))
return [y0,x1,x2,x3]

class VGG:
def __init__(self, fn="VGG_ILSVRC_16_layers.caffemodel", alpha=[0,0,1,1], beta=[1,1,1,1]):
print ("load model... %s"%fn)
self.model = caffe.CaffeFunction(fn)
self.alpha = alpha
self.beta = beta
def forward(self, x):
y1 = self.model.conv1_2(F.relu(self.model.conv1_1(x)))
x1 = F.average_pooling_2d(F.relu(y1), 2, stride=2)
y2 = self.model.conv2_2(F.relu(self.model.conv2_1(x1)))
x2 = F.average_pooling_2d(F.relu(y2), 2, stride=2)
y3 = self.model.conv3_3(F.relu(self.model.conv3_2(F.relu(self.model.conv3_1(x2)))))
x3 = F.average_pooling_2d(F.relu(y3), 2, stride=2)
y4 = self.model.conv4_3(F.relu(self.model.conv4_2(F.relu(self.model.conv4_1(x3)))))
return [y1,y2,y3,y4]

class VGG_chainer:
def __init__(self, alpha=[0,0,1,1], beta=[1,1,1,1]):
from chainer.links import VGG16Layers
print ("load model... vgg_chainer")
self.model = VGG16Layers()
self.alpha = alpha
self.beta = beta
def forward(self, x):
feature = self.model(x, layers=["conv1_2", "conv2_2", "conv3_3", "conv4_3"])
return [feature["conv1_2"], feature["conv2_2"], feature["conv3_3"], feature["conv4_3"]]

class I2V:
def __init__(self, fn="illust2vec_tag_ver200.caffemodel", alpha=[0,0,0,1,10,100], beta=[0.1,1,1,10,100,1000]):
print ("load model... %s"%fn)
self.model = caffe.CaffeFunction(fn)
self.alpha = alpha
self.beta = beta
self.pool_func = F.average_pooling_2d

def forward(self, x):
y1 = self.model.conv1_1(x)
x1 = self.pool_func(F.relu(y1), 2, stride=2)
y2 = self.model.conv2_1(x1)
x2 = self.pool_func(F.relu(y2), 2, stride=2)
y3 = self.model.conv3_2(F.relu(self.model.conv3_1(x2)))
x3 = self.pool_func(F.relu(y3), 2, stride=2)
y4 = self.model.conv4_2(F.relu(self.model.conv4_1(x3)))
x4 = self.pool_func(F.relu(y4), 2, stride=2)
y5 = self.model.conv5_2(F.relu(self.model.conv5_1(x4)))
x5 = self.pool_func(F.relu(y5), 2, stride=2)
y6 = self.model.conv6_4(F.relu(F.dropout(self.model.conv6_3(F.relu(self.model.conv6_2(F.relu(self.model.conv6_1(x5))))),train=False)))
return [y1,y2,y3,y4,y5,y6]

class GoogLeNet:
def __init__(self, fn="bvlc_googlenet.caffemodel", alpha=[0,0,0,0,1,10], beta=[0.00005, 5, 50, 50, 5000, 500000]):
print ("load model... %s"%fn)
self.model = caffe.CaffeFunction(fn)
self.alpha = alpha
self.beta = beta
self.pool_func = F.average_pooling_2d

def forward(self, x):
y1 = self.model['conv1/7x7_s2'](x)
h = F.relu(y1)
h = F.local_response_normalization(self.pool_func(h, 3, stride=2), n=5)
h = F.relu(self.model['conv2/3x3_reduce'](h))
y2 = self.model['conv2/3x3'](h)
h = F.relu(y2)
h = self.pool_func(F.local_response_normalization(h, n=5), 3, stride=2)
out1 = self.model['inception_3a/1x1'](h)
out3 = self.model['inception_3a/3x3'](F.relu(self.model['inception_3a/3x3_reduce'](h)))
out5 = self.model['inception_3a/5x5'](F.relu(self.model['inception_3a/5x5_reduce'](h)))
pool = self.model['inception_3a/pool_proj'](self.pool_func(h, 3, stride=1, pad=1))
y3 = F.concat((out1, out3, out5, pool), axis=1)
h = F.relu(y3)

out1 = self.model['inception_3b/1x1'](h)
out3 = self.model['inception_3b/3x3'](F.relu(self.model['inception_3b/3x3_reduce'](h)))
out5 = self.model['inception_3b/5x5'](F.relu(self.model['inception_3b/5x5_reduce'](h)))
pool = self.model['inception_3b/pool_proj'](self.pool_func(h, 3, stride=1, pad=1))
y4 = F.concat((out1, out3, out5, pool), axis=1)
h = F.relu(y4)

h = self.pool_func(h, 3, stride=2)

out1 = self.model['inception_4a/1x1'](h)
out3 = self.model['inception_4a/3x3'](F.relu(self.model['inception_4a/3x3_reduce'](h)))
out5 = self.model['inception_4a/5x5'](F.relu(self.model['inception_4a/5x5_reduce'](h)))
pool = self.model['inception_4a/pool_proj'](self.pool_func(h, 3, stride=1, pad=1))
y5 = F.concat((out1, out3, out5, pool), axis=1)
h = F.relu(y5)

out1 = self.model['inception_4b/1x1'](h)
out3 = self.model['inception_4b/3x3'](F.relu(self.model['inception_4b/3x3_reduce'](h)))
out5 = self.model['inception_4b/5x5'](F.relu(self.model['inception_4b/5x5_reduce'](h)))
pool = self.model['inception_4b/pool_proj'](self.pool_func(h, 3, stride=1, pad=1))
y6 = F.concat((out1, out3, out5, pool), axis=1)
h = F.relu(y6)

return [y1,y2,y3,y4,y5,y6]

いよいよ合成処理を実行します。
139行目から147行目で入力画像や各パラメータを設定しています。

1
2
3
4
5
6
7
8
9
10
11
12
13
14
15
16
17
18
19
20
21
22
23
24
25
26
27
28
29
30
31
32
33
34
35
36
37
38
39
40
41
42
43
44
45
46
47
48
49
50
51
52
53
54
55
56
57
58
59
60
61
62
63
64
65
66
67
68
69
70
71
72
73
74
75
76
77
78
79
80
81
82
83
84
85
86
87
88
89
90
91
92
93
94
95
96
97
98
99
100
101
102
103
104
105
106
107
108
109
110
111
112
113
114
115
116
117
118
119
120
121
122
123
124
125
126
127
128
129
130
131
132
133
134
135
136
137
138
139
140
141
142
143
144
145
146
147
148
149
150
151
152
153
154
155
156
157
158
159
160
161
162
163
164
165
166
167
168
169
170
171
172
173
174
175
176
177
import argparse
import os
import sys

import numpy as np
from PIL import Image

import chainer
from chainer import cuda
import chainer.functions as F
import chainer.links
from chainer.links import caffe
from chainer import Variable, optimizers

import pickle

def subtract_mean(x0):
x = x0.copy()
x[0,0,:,:] -= 120
x[0,1,:,:] -= 120
x[0,2,:,:] -= 120
return x
def add_mean(x0):
x = x0.copy()
x[0,0,:,:] += 120
x[0,1,:,:] += 120
x[0,2,:,:] += 120
return x

def image_resize(img_file, width):
gogh = Image.open(img_file)
orig_w, orig_h = gogh.size[0], gogh.size[1]
if orig_w>orig_h:
new_w = width
new_h = width*orig_h//orig_w
gogh = np.asarray(gogh.resize((new_w,new_h)))[:,:,:3].transpose(2, 0, 1)[::-1].astype(np.float32)
gogh = gogh.reshape((1,3,new_h,new_w))
print("image resized to: ", gogh.shape)
hoge= np.zeros((1,3,width,width), dtype=np.float32)
hoge[0,:,width-new_h:,:] = gogh[0,:,:,:]
gogh = subtract_mean(hoge)
else:
new_w = width*orig_w//orig_h
new_h = width
gogh = np.asarray(gogh.resize((new_w,new_h)))[:,:,:3].transpose(2, 0, 1)[::-1].astype(np.float32)
gogh = gogh.reshape((1,3,new_h,new_w))
print("image resized to: ", gogh.shape)
hoge= np.zeros((1,3,width,width), dtype=np.float32)
hoge[0,:,:,width-new_w:] = gogh[0,:,:,:]
gogh = subtract_mean(hoge)
return xp.asarray(gogh), new_w, new_h

def save_image(img, width, new_w, new_h, it):
def to_img(x):
im = np.zeros((new_h,new_w,3))
im[:,:,0] = x[2,:,:]
im[:,:,1] = x[1,:,:]
im[:,:,2] = x[0,:,:]
def clip(a):
return 0 if a<0 else (255 if a>255 else a)
im = np.vectorize(clip)(im).astype(np.uint8)
Image.fromarray(im).save(args['out_dir']+"/im_%05d.png"%it)

if args['gpu']>=0:
img_cpu = add_mean(img.get())
else:
img_cpu = add_mean(img)
if width==new_w:
to_img(img_cpu[0,:,width-new_h:,:])
else:
to_img(img_cpu[0,:,:,width-new_w:])

def get_matrix(y):
ch = y.data.shape[1]
wd = y.data.shape[2]
gogh_y = F.reshape(y, (ch,wd**2))
gogh_matrix = F.matmul(gogh_y, gogh_y, transb=True)/np.float32(ch*wd**2)
return gogh_matrix

class Clip(chainer.Function):
def forward(self, x):
x = x[0]
ret = cuda.elementwise(
'T x','T ret',
'''
ret = x<-120?-120:(x>136?136:x);
''','clip')(x)
return ret

def generate_image(img_orig, img_style, width, nw, nh, max_iter, lr, img_gen=None):
mid_orig = nn.forward(Variable(img_orig))
style_mats = [get_matrix(y) for y in nn.forward(Variable(img_style))]

if img_gen is None:
if args['gpu'] >= 0:
img_gen = xp.random.uniform(-20,20,(1,3,width,width),dtype=np.float32)
else:
img_gen = np.random.uniform(-20,20,(1,3,width,width)).astype(np.float32)
img_gen = chainer.links.Parameter(img_gen)
optimizer = optimizers.Adam(alpha=lr)
optimizer.setup(img_gen)
for i in range(max_iter):
img_gen.zerograds()

x = img_gen.W
y = nn.forward(x)

L = Variable(xp.zeros((), dtype=np.float32))
for l in range(len(y)):
ch = y[l].data.shape[1]
wd = y[l].data.shape[2]
gogh_y = F.reshape(y[l], (ch,wd**2))
gogh_matrix = F.matmul(gogh_y, gogh_y, transb=True)/np.float32(ch*wd**2)

L1 = np.float32(args['lam']) * np.float32(nn.alpha[l])*F.mean_squared_error(y[l], Variable(mid_orig[l].data))
L2 = np.float32(nn.beta[l])*F.mean_squared_error(gogh_matrix, Variable(style_mats[l].data))/np.float32(len(y))
L += L1+L2

if i%100==0:
print(i,l,L1.data,L2.data)

L.backward()
img_gen.W.grad = x.grad
optimizer.update()

tmp_shape = x.data.shape
if args['gpu'] >= 0:
img_gen.W.data += Clip().forward(img_gen.W.data).reshape(tmp_shape) - img_gen.W.data
else:
def clip(x):
return -120 if x<-120 else (136 if x>136 else x)
img_gen.W.data += np.vectorize(clip)(img_gen.W.data).reshape(tmp_shape) - img_gen.W.data

if i%50==0:
save_image(img_gen.W.data, W, nw, nh, i)

# 各パラメータを設定
args = {}
args['orig_img'] = 'cat.png' # オリジナルファイル
args['style_img'] = 'style_6.png' # スタイルファイル
args['out_dir'] = 'result' # 出力ディレクトリ
args['model'] = 'nin_imagenet.caffemodel' # 学習済みモデルファイル
args['width'] = 435 # 出力画像の幅
args['iter'] = 5000 # 繰り返し回数
args['gpu'] = -1
args['lam'] = 0.005
args['lr'] = 4.0

if args['gpu'] >= 0:
cuda.check_cuda_available()
chainer.Function.type_check_enable = False
cuda.get_device(args['gpu']).use()
xp = cuda.cupy
else:
xp = np

if 'nin' in args['model']:
nn = NIN()
elif 'vgg' == args['model']:
nn = VGG()
elif 'vgg_chainer' == args['model']:
nn = VGG_chainer()
elif 'i2v' in args['model']:
nn = I2V()
elif 'googlenet' in args['model']:
nn = GoogLeNet()
else:
print ('invalid model name. you can use (nin, vgg, vgg_chainer, i2v, googlenet)')
if args['gpu']>=0:
nn.model.to_gpu()

W = args['width']
img_content,nw,nh = image_resize(args['orig_img'], W)
img_style,_,_ = image_resize(args['style_img'], W)

generate_image(img_content, img_style, W, nw, nh, img_gen=None, max_iter=args['iter'], lr=args['lr'])

[入力ファイル] ※あらかじめGoogle Colaboratoryにアップロードしておきます。

入力ファイル 内容
cat.png オリジナルファイル
style_6.png スタイルファイル(オリジナルファイルをこのファイルっぽく画像合成する)
nin_imagenet.caffemodel 学習済みモデルファイル(ネットに落ちてます)

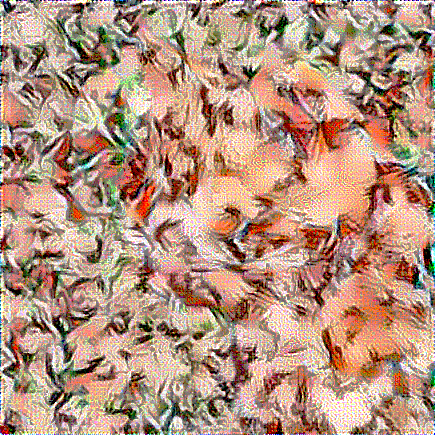
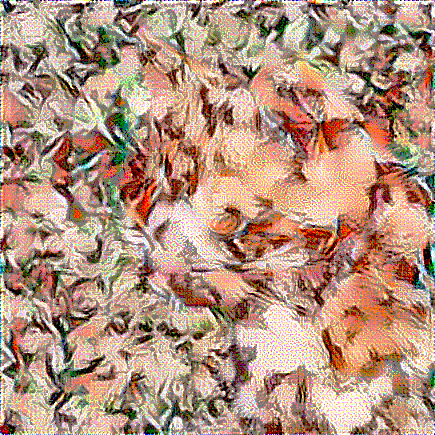
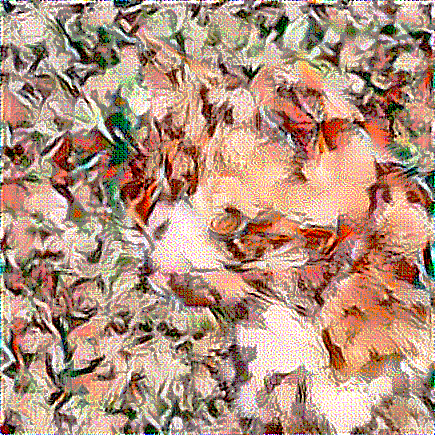
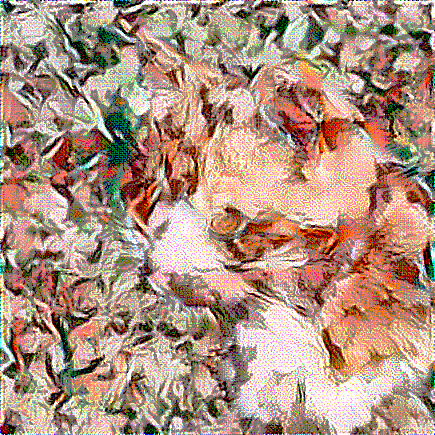
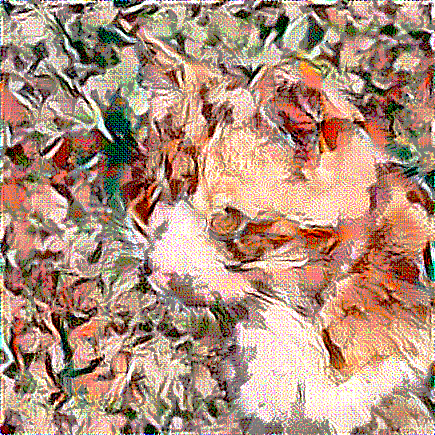
[合成された画像] ※50ファイル出力されるので、そのうち5ファイルをピックアップしてます。

im_01000.png
im_02000.png
im_03000.png
im_04000.png
im_04950.png

合成時間がかかるものの写真をマンガ風にしたり、ゴシック調にしたりとなにかに使えるような気がしないでもありません。。。

(Google Colaboratoryで動作確認しています。)

学習モデルを使って手書き数字を判定

前回作成した学習モデルを使って手書き数字を判定します。

判定したい画像ファイルを36行目に指定して実行します。

1
2
3
4
5
6
7
8
9
10
11
12
13
14
15
16
17
18
19
20
21
22
23
24
25
26
27
28
29
30
31
32
33
34
35
36
37
38
39
40
41
42
43
44
45
46
47
48
49
50
51
52
53
54
55
56
57
58
59
from __future__ import print_function
import argparse

import chainer
import chainer.functions as F
import chainer.links as L
import chainer.initializers as I
from chainer import training
from chainer.training import extensions
from PIL import Image
import numpy as np

class MLP(chainer.Chain):
def __init__(self, n_units, n_out):
w = I.Normal(scale=0.05) # モデルパラメータの初期化
super(MLP, self).__init__(
conv1=L.Convolution2D(1, 16, 5, 1, 0), # 1層目の畳み込み層(フィルタ数は16)
conv2=L.Convolution2D(16, 32, 5, 1, 0), # 2層目の畳み込み層(フィルタ数は32)
l3=L.Linear(None, n_out, initialW=w), #クラス分類用
)
def __call__(self, x):
h1 = F.max_pooling_2d(F.relu(self.conv1(x)), ksize=2, stride=2) # 最大値プーリングは2×2,活性化関数はReLU
h2 = F.max_pooling_2d(F.relu(self.conv2(h1)), ksize=2, stride=2)
y = self.l3(h2)
return y
"""
自分で用意した手書き文字画像をモデルに合うように変換する処理
"""
def convert_cnn(img):
data = np.array(Image.open(img).convert('L').resize((28, 28)), dtype=np.float32) # ファイルを読込み,リサイズして配列に変換
data = (255.0 - data) / 255.0 # 白黒反転して正規化
data = data.reshape(1, 1, 28, 28) # データの形状を変更
return data

def main():
inputimage = '3.png' # 入力する画像
modelfile = 'result/MLP.model' # 学習済みモデルファイル
unit = 1000 # ユニット数

print('自分の手書き文字を学習したモデルで評価してみるプログラム')
print('# 入力画像ファイル: {}'.format(inputimage))
print('# 学習済みモデルファイル: {}'.format(modelfile))
print('')

# モデルのインスタンス作成
model = L.Classifier(MLP(unit, 10))
# モデルの読み込み
chainer.serializers.load_npz(modelfile, model)

# 入力画像を28x28のグレースケールデータ(0-1に正規化)に変換する
img = convert_cnn(inputimage)
x = chainer.Variable(np.asarray(img)) # 配列データをchainerで扱う型に変換

y = model.predictor(x) # フォワード
c = F.softmax(y).data.argmax()
print('判定結果は{}です。'.format(c))

if __name__ == '__main__':
main()

200x200の画像ファイルに手書きで数字をかいた画像ファイルを3つ用意して判定しました。

[入力ファイル]
手書きの3
[結果]

1
2
3
4
5
自分の手書き文字を学習したモデルで評価してみるプログラム
# 入力画像ファイル: 3.png
# 学習済みモデルファイル: result/MLP.model

判定結果は3です。

[入力ファイル]
手書きの5
[結果]

1
2
3
4
5
自分の手書き文字を学習したモデルで評価してみるプログラム
# 入力画像ファイル: 5.png
# 学習済みモデルファイル: result/MLP.model

判定結果は5です。

[入力ファイル]
手書きの9
[結果]

1
2
3
4
5
自分の手書き文字を学習したモデルで評価してみるプログラム
# 入力画像ファイル: 9.png
# 学習済みモデルファイル: result/MLP.model

判定結果は3です。

1問不正解となりました。。。最後の手書き数字はどうみても9ですよね。

(Google Colaboratoryで動作確認しています。)

画像認識に向いているCNN

畳み込みニューラル・ネットワーク(CNN)は画像処理に強いディープ・ラーニングとのことです。
CNNを使って手書きの文字を入力し文字を認識させてみます。

1
2
3
4
5
6
7
8
9
10
11
12
13
14
15
16
17
18
19
20
21
22
23
24
25
26
27
28
29
30
31
32
33
34
35
36
37
38
39
40
41
42
43
44
45
46
47
48
49
50
51
52
53
54
55
56
57
58
59
60
61
62
63
64
65
66
67
68
69
70
71
72
73
74
from __future__ import print_function
import argparse

import chainer
import chainer.functions as F
import chainer.links as L
import chainer.initializers as I
from chainer import training
from chainer.training import extensions

class MLP(chainer.Chain):
def __init__(self, n_units, n_out):
w = I.Normal(scale=0.05) # モデルパラメータの初期化
super(MLP, self).__init__(
conv1=L.Convolution2D(1, 16, 5, 1, 0), # 1層目の畳み込み層(フィルタ数は16)
conv2=L.Convolution2D(16, 32, 5, 1, 0), # 2層目の畳み込み層(フィルタ数は32)
l3=L.Linear(None, n_out, initialW=w), #クラス分類用
)
def __call__(self, x):
h1 = F.max_pooling_2d(F.relu(self.conv1(x)), ksize=2, stride=2) # 最大値プーリングは2×2,活性化関数はReLU
h2 = F.max_pooling_2d(F.relu(self.conv2(h1)), ksize=2, stride=2)
y = self.l3(h2)
return y

def main():
parser = argparse.ArgumentParser(description='Chainer example: MNIST')
parser.add_argument('--batchsize', '-b', type=int, default=100, help='Number of images in each mini-batch')
parser.add_argument('--epoch', '-e', type=int, default=20, help='Number of sweeps over the dataset to train')
parser.add_argument('--gpu', '-g', type=int, default=-1, help='GPU ID (negative value indicates CPU)')
parser.add_argument('--out', '-o', default='result', help='Directory to output the result')
parser.add_argument('--resume', '-r', default='', help='Resume the training from snapshot')
parser.add_argument('--unit', '-u', type=int, default=1000, help='Number of units')
#args = parser.parse_args()
args = parser.parse_args(args=[]) # Jupyter用

print('GPU: {}'.format(args.gpu))
print('# unit: {}'.format(args.unit))
print('# Minibatch-size: {}'.format(args.batchsize))
print('# epoch: {}'.format(args.epoch))
print('')

train, test = chainer.datasets.get_mnist(ndim=3) # ndim=3を引数で与えるだけでOK
model = L.Classifier(MLP(args.unit, 10), lossfun=F.softmax_cross_entropy)
if args.gpu >= 0:
chainer.cuda.get_device(args.gpu).use()
model.to_gpu()
optimizer = chainer.optimizers.Adam()
optimizer.setup(model)
train_iter = chainer.iterators.SerialIterator(train, args.batchsize)
test_iter = chainer.iterators.SerialIterator(test, args.batchsize, repeat=False, shuffle=False)
updater = training.StandardUpdater(train_iter, optimizer, device=args.gpu)

trainer = training.Trainer(updater, (args.epoch, 'epoch'), out=args.out)
trainer.extend(extensions.Evaluator(test_iter, model, device=args.gpu))
trainer.extend(extensions.dump_graph('main/loss'))
trainer.extend(extensions.snapshot(), trigger=(args.epoch, 'epoch'))
trainer.extend(extensions.LogReport())
trainer.extend( extensions.PlotReport(['main/loss', 'validation/main/loss'], 'epoch', file_name='loss.png'))
trainer.extend( extensions.PlotReport(['main/accuracy', 'validation/main/accuracy'], 'epoch', file_name='accuracy.png'))
trainer.extend(extensions.PrintReport( ['epoch', 'main/loss', 'validation/main/loss', 'main/accuracy', 'validation/main/accuracy', 'elapsed_time']))
trainer.extend(extensions.ProgressBar())

if args.resume:
chainer.serializers.load_npz(args.resume, trainer)

trainer.run()
model.to_cpu()

modelname = args.out + "/MLP.model"
print('save the trained model: {}'.format(modelname))
chainer.serializers.save_npz(modelname, model)

if __name__ == '__main__':
main()

[実行結果]

1
2
3
4
5
6
7
8
9
10
11
12
13
14
15
16
17
18
19
20
21
22
23
24
25
26
27
28
29
30
31
GPU: -1
# unit: 1000
# Minibatch-size: 100
# epoch: 20

Downloading from http://yann.lecun.com/exdb/mnist/train-images-idx3-ubyte.gz...
Downloading from http://yann.lecun.com/exdb/mnist/train-labels-idx1-ubyte.gz...
Downloading from http://yann.lecun.com/exdb/mnist/t10k-images-idx3-ubyte.gz...
Downloading from http://yann.lecun.com/exdb/mnist/t10k-labels-idx1-ubyte.gz...
epoch main/loss validation/main/loss main/accuracy validation/main/accuracy elapsed_time
1 0.231759 0.0724735 0.935317 0.9783 92.431
2 0.0670751 0.0424591 0.980317 0.9862 244.515
3 0.0477893 0.0391225 0.98565 0.9865 396.184
4 0.0395797 0.0346431 0.987767 0.9892 547.208
5 0.0323916 0.035994 0.99 0.9883 698.513
6 0.0277908 0.032813 0.99155 0.9892 788.491
7 0.0233976 0.0334056 0.9929 0.9896 878.809
8 0.0202218 0.0281953 0.9938 0.9912 1029.3
9 0.0174586 0.0332045 0.994483 0.9901 1179.88
10 0.0150536 0.0278408 0.995333 0.9919 1269.85
11 0.0141825 0.0325213 0.995583 0.991 1360.04
12 0.0118445 0.0382767 0.996233 0.9893 1509.41
13 0.0107907 0.0331525 0.996683 0.9905 1659.55
14 0.00933434 0.0442279 0.9967 0.9885 1809.8
15 0.00836822 0.0357421 0.997333 0.9895 1932.74
16 0.00697497 0.0377525 0.9977 0.9896 2022.73
17 0.0075223 0.0438979 0.997383 0.9875 2174.04
18 0.00604851 0.0376632 0.99795 0.9914 2327.5
19 0.00420569 0.0373403 0.998817 0.9913 2492.95
20 0.00607973 0.0395273 0.99795 0.9905 2650.21
save the trained model: result/MLP.model

各項目の意味は下記の通りです。

名称 内容
epoch 学習回数
main/loss 出力と学習データの誤差
validation/main/loss 出力とテスト・データの誤差
main/accuracy 学習データの正答率
validation/main/accuracy テスト・データの正答率
elapsed_time 経過時間(秒)

最終的なテスト・データの正答率(validation/main/accuracy)は99.05%とのかなり優秀な結果となりました。
エポック数と正答率(main/accuracy、validation/main/accuracy)の関係は下記のグラフのようになります。
(validationがテストデータの方を表します。)
正答率

エポック数と誤差(validation/main/loss)の関係は下記のグラフのようになります。
誤差

(Google Colaboratoryで動作確認しています。)

ループを使わない書き方

map関数

Pythonではfor文でのループよりもmap関数を使うのがいいコードとのことです。

例えば文字列を数字に変換する場合、for文で書くと次のようになります。

1
2
3
4
5
6
7
in_data = ["1", "2", "3"]

out_data = []
for d in in_data:
out_data.append(int(d))

print(out_data) # 出力 [1, 2, 3]

map関数で書き換えると下記のようになります。

1
2
3
4
5
in_data = ["1", "2", "3"]

out_data = map(int, in_data)

print(list(out_data)) # 出力 [1, 2, 3]

だいぶコンパクトなコードになりいい感じです。

上記は関数のとる引数が1つの場合ですが、引数を複数とる関数の場合はカンマで区切って別のリスト型変数を指定すればいいです。

1
2
3
4
5
in_data1 = [1, 2, 3]
in_data2 = [1, 2, 3]

out_data = map(lambda x,y:x+y, in_data1, in_data2)
print(list(out_data)) # 出力 [2, 4, 6]

引数のデータサイズ数が違う場合は自動で短い配列の方に合わせられるようです。

1
2
3
4
5
in_data1 = [1, 2, 3]
in_data2 = [1, 2]

out_data = map(lambda x,y:x+y, in_data1, in_data2)
print(list(out_data)) # 出力 [2, 4]

filter関数

リスト型データからある条件に合致するデータを抽出します。
filter関数の第一引数は抽出用の関数で、第二引数はデータとなります。

1
2
3
4
5
6
7
8
in_data = ['a.txt', 'b.doc', 'c.txt', 'd.jpg']

def is_txt(x):
return x.endswith('.txt')

out_data = filter(is_txt, in_data)

print(list(out_data)) # 出力 ['a.txt', 'c.txt']

関数を別定義するのはちょっとまどろっこしい感じがしますが、下記のようにlambdaを使うと1行で書けるようになり便利&シンプルです。

1
2
3
4
5
in_data = ['a.txt', 'b.doc', 'c.txt', 'd.jpg']

out_data = filter(lambda x: x.endswith('.txt'), in_data)

print(list(out_data)) # 出力 ['a.txt', 'c.txt']

reduce関数

配列のすべてのデータに関して順次処理を行います。
ポイントとしては第一引数には引数を2つとる関数を指定します。
Python3からはreduce関数を使うためにはimportを書かないといけないとのことです。

1
2
3
4
5
6
7
from functools import reduce

in_data = [1, 2, 3]

out_data = reduce(lambda x, y: x + y, in_data)

print(out_data) # 出力 6

上記は1+2した結果にさらに3を足して6になる・・・ということらしいです。

reduceの第3引数には下記のように初期値を設定することができます。

1
2
3
4
5
6
7
from functools import reduce

in_data = [1, 2, 3]

out_data = reduce(lambda x, y: x + y, in_data, 10)

print(out_data) # 出力 16

初期値10に1足して、それに2足して、最後に3を足して16となります。
実務処理で私はこの関数を使ったことがありません。。。ですが、機械学習とかで便利なことがあるのかもしれません・・・タブン。

(Google Colaboratoryで動作確認しています。)

教師あり学習でBMI肥満度分類

BMI値の算出式で導き出された肥満度分類を、算出式を使わずSVM(サポートベクターマシン)で分類してみます。

手順としては下記の通りです。
①乱数を使って10000万件の身長・体重データを生成し、BMI値を算出し肥満度分類を行う。
②身長・体重データと肥満度分類のデータを8割の学習データと2割のテストデータに分ける。
③8割のデータを学習させる。
④学習データをもとに2割のテストデータでデータ予測を行う。
⑤データ予測がどれだけ正しかったかの結果を表示する。

[データ作成]

1
2
3
4
5
6
7
8
9
10
11
12
13
14
15
16
17
18
19
20
21
22
import random

# BMIを算出し、体型を3パターンで返す
def calc_bmi(height, weight):
bmi = weight / (height / 100) ** 2
if bmi < 18.5:
return '痩せ'
elif bmi < 25:
return '普通'
else:
return '肥満'

# データ作成 ← 手順①
lst_label = []
lst_height_weight = []
for i in range(10000):
height = random.randint(100, 200) # 100cm~200cmの身長を生成
weight = random.randint(30, 100) # 30kg~60kgの体重を生成
label = calc_bmi(height, weight)

lst_height_weight.append([height, weight])
lst_label.append(label)

[SVMを使っての学習と予測]

1
2
3
4
5
6
7
8
9
10
11
12
13
14
15
from sklearn import model_selection, svm, metrics
import matplotlib.pyplot as plt
import pandas as pd

# 学習データとテストデータに分ける ← 手順②
# テストデータの割合はtest_sizeで指定(0.0~1.0)
data_train, data_test, label_train, label_test = \
model_selection.train_test_split(lst_height_weight, lst_label, test_size=0.2)

# データを学習 ← 手順③
clf = svm.SVC()
clf.fit(data_train, label_train)

# データを予測 ← 手順④
predict = clf.predict(data_test)

[結果表示]

1
2
3
# 結果確認 ← 手順⑤
print('正解率=', metrics.accuracy_score(label_test, predict))
print('レポート=\n', metrics.classification_report(label_test, predict))

[出力結果]

1
2
3
4
5
6
7
8
9
10
11
正解率= 0.994
レポート=
precision recall f1-score support

普通 0.99 0.98 0.98 391
痩せ 0.99 1.00 0.99 430
肥満 1.00 1.00 1.00 1179

accuracy 0.99 2000
macro avg 0.99 0.99 0.99 2000
weighted avg 0.99 0.99 0.99 2000

正解率は99.4%と十分に納得いく結果となりました。
レポートの見方は下記の通りです。

名称 内容
precision 予測が正だった中で、予測通り正答分類できた割合
recall 実際に正だった中で、予測も正答だった割合
f1-score precisionとrecallの調和平均
support データ数

(Google Colaboratoryで動作確認しています。)

クロスバリデーション(交差検証)

分類の検証を行う場合に、データ全体を何分割かして分割した回数分検証を行う方法です。
例えば5分割の場合、学習データを8割、検証データを2割に分割して検証し、さらに検証データをかえて実行・・・・といった感じに5回検証を行います。

[アヤメのデータをダウンロード]

1
!wget https://raw.githubusercontent.com/pandas-dev/pandas/master/pandas/tests/data/iris.csv

[5分割でクロスバリデーション実行]

1
2
3
4
5
6
7
8
9
10
11
12
13
14
15
import pandas as pd
from sklearn import svm, metrics, model_selection

# アヤメデータを読み込む
csv = pd.read_csv('iris.csv')

# データとラベルに分割
data = csv[['SepalLength', 'SepalWidth', 'PetalLength', 'PetalWidth']]
label = csv['Name']

# クロスバリデーション(交差検証)を行う
clf = svm.SVC()
score = model_selection.cross_val_score(clf, data, label, cv=5) # cv=5は5分割の意
print('各正解率', score)
print('正解率', score.mean())

[出力結果]

1
2
各正解率 [0.96666667 1.         0.96666667 0.96666667 1.        ]
正解率 0.9800000000000001

5回分の検証結果が96%~100%、平均正解率も98%以上なので十分実用性がある・・・ということになると思います。。

(Google Colaboratoryで動作確認しています。)

なにが画像に写っているかを調べる

機械学習というものを動作させてみたくてまずは画像認識から始めることにしました。
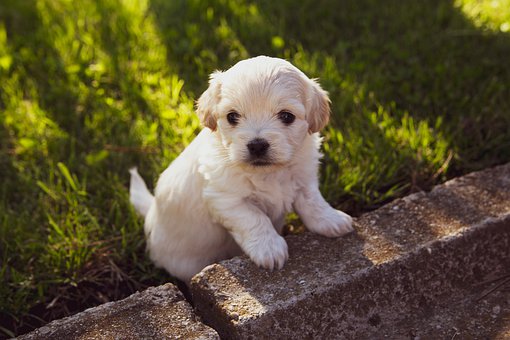
画像を指定して、何が写っている可能性何パーセントと表示してくれるサンプルコードを実行してみました。

Jupyterのマジックコードを使って、Tensorflow配布サイトから画像識別用のプログラムとサンプル画像をダウンロードします。

1
2
3
!wget https://raw.githubusercontent.com/tensorflow/models/master/tutorials/image/imagenet/classify_image.py
!wget https://cdn.pixabay.com/photo/2019/05/28/05/47/puppy-4234435__340.jpg
!wget https://cdn.pixabay.com/photo/2015/12/08/00/31/office-1081807__340.jpg

1枚目の画像認識プログラムを実行します。

1
!python classify_image.py --image_file puppy-4234435__340.jpg

puppy-4234435__340.jpg
[結果]

1
2
3
4
5
Lhasa, Lhasa apso (score = 0.29679)
Maltese dog, Maltese terrier, Maltese (score = 0.20975)
clumber, clumber spaniel (score = 0.08200)
cocker spaniel, English cocker spaniel, cocker (score = 0.05887)
Pekinese, Pekingese, Peke (score = 0.04576)

Lhasa apso 29%(ラサアプソ=チベット原産の愛玩犬に分類される犬種のひとつ)
Maltese dog 20%(マルチーズ)

犬なのは分かってますが、その先の犬種まで言い当てようとしてます・・・というか犬種がなんなのか私にはわかりません。(汗)
・・・っていうか犬か猫かどっちかなーくらいの結果がでるのかと思ってました。

2枚目の画像認識プログラムを実行します。

1
!python classify_image.py --image_file office-1081807__340.jpg

office-1081807__340.jpg
[結果]

1
2
3
4
5
desk (score = 0.27846)
mouse, computer mouse (score = 0.08432)
laptop, laptop computer (score = 0.04696)
barbershop (score = 0.03265)
notebook, notebook computer (score = 0.02900)

机 27%
パソコンのマウス 8%
ノートパソコン 4%
理髪店 3%

机とノートパソコンは間違いないですが、2番目のマウスはコップを持つ手のところがそう見えてしまったのでしょうか。
4番目の理髪店は・・・・全体的にそう見えなくもないですが3%なので許したいところです。

1行もコード書いてないのにここまでできるなんて・・・すごいの通り越してコワイデス。

(Google Colaboratoryで動作確認しています。)

Bootstrapテスト


ツールチップサンプル


test3

お勧め default

お勧め h1

お勧め h3

お勧め h5


test3


end

Keras 深層学習で画像分類

自前で用意した画像を手作業で分類し、CNNで学習してみる。
さらに学習したデータを使って指定した画像が分類できるかどうかを確認してみた。

手順は下記の通り。
 ① Numpyのバージョンを変更する。
 ②画像データを設定する。
 ③画像データを数値データに変換する。
 ④CNN(畳み込みニューラルネットワーク)で学習する。
 ⑤画像判定してみる。

手順①
Google ColaboratoryのNumpyバージョンは1.16.4だが、これだとうまく動作しないのでNumpyを1.16.2にダウングレード。

1
2
3
4
5
# アンインストール
pip3 uninstall numpy

# ダウングレードしてインストール
pip3 install numpy==1.16.2

手順②
手動で分類した画像データをアップロード。
画像データ

手順③
画像データを数値化して、学習データとテストデータに分類して、bunrui/hana.npyに保存する。

1
2
3
4
5
6
7
8
9
10
11
12
13
14
15
16
17
18
19
20
21
22
23
24
25
26
27
28
29
30
31
32
33
34
35
36
37
38
39
40
41
42
43
44
45
46
47
48
49
50
51
52
53
54
55
56
57
58
59
60
61
62
63
64
65
66
67
68
69
70
71
72
73
74
75
76
77
78
79
80
81
82
83
84
85
86
87
88
89
90
91
92
93
94
95
96
97
98
99
100
101
102
103
from sklearn import model_selection
from PIL import Image
import os, glob
import numpy as np

# 分類カテゴリ
root_dir = "./bunrui/"
categories = ["ajisai", "himawari", "tanpopo"]
nb_classes = len(categories)
image_size = 50

# フォルダごとの画像データを読み込む
X = [] # 画像データ
Y = [] # ラベルデータ
for idx, cat in enumerate(categories):
image_dir = os.path.join(root_dir, cat)
files = glob.glob(image_dir + "/*.jpg")
print("---", cat, "を処理中")
for i, f in enumerate(files):
img = Image.open(f)
img = img.convert("RGB") # カラーモードの変更
img = img.resize((image_size, image_size)) # 画像サイズの変更
data = np.asarray(img)
X.append(data)
Y.append(idx)
X = np.array(X)
Y = np.array(Y)

# 学習データとテストデータを分割
X_train, X_test, y_train, y_test = model_selection.train_test_split(X, Y)
xy = (X_train, X_test, y_train, y_test)
np.save("./bunrui/hana.npy", xy)
print("ok,", len(Y))</pre>

<strong>手順④</strong>
手順③で保存したデータをロードし、モデル化・学習・評価を行う。
モデル化したデータは<code>bunrui/hana.hdf5</code>に保存する。
<pre>from keras.models import Sequential
from keras.layers import Convolution2D, MaxPooling2D
from keras.layers import Activation, Dropout, Flatten, Dense
from keras.utils import np_utils
import numpy as np

# 分類対象のカテゴリ
root_dir = "./bunrui/"
categories = ["ajisai", "himawari", "tanpopo"]
nb_classes = len(categories)
image_size = 50

# データをロード
def main():
X_train, X_test, y_train, y_test = np.load("./bunrui/hana.npy")
# データを正規化
X_train = X_train.astype("float") / 256
X_test = X_test.astype("float") / 256
y_train = np_utils.to_categorical(y_train, nb_classes)
y_test = np_utils.to_categorical(y_test, nb_classes)
# モデルを学習し評価
model = model_train(X_train, y_train)
model_eval(model, X_test, y_test)

# モデルを構築
def build_model(in_shape):
model = Sequential()
model.add(Convolution2D(32, 3, 3,
border_mode='same',
input_shape=in_shape))
model.add(Activation('relu'))
model.add(MaxPooling2D(pool_size=(2, 2)))
model.add(Dropout(0.25))
model.add(Convolution2D(64, 3, 3, border_mode='same'))
model.add(Activation('relu'))
model.add(Convolution2D(64, 3, 3))
model.add(MaxPooling2D(pool_size=(2, 2)))
model.add(Dropout(0.25))
model.add(Flatten())
model.add(Dense(512))
model.add(Activation('relu'))
model.add(Dropout(0.5))
model.add(Dense(nb_classes))
model.add(Activation('softmax'))
model.compile(loss='binary_crossentropy',
optimizer='rmsprop',
metrics=['accuracy'])
return model

# モデルを学習
def model_train(X, y):
model = build_model(X.shape[1:])
model.fit(X, y, batch_size=32, nb_epoch=30)
# モデルを保存
hdf5_file = "./bunrui/hana.hdf5"
model.save_weights(hdf5_file)
return model

# モデルを評価
def model_eval(model, X, y):
score = model.evaluate(X, y)
print('loss=', score[0])
print('accuracy=', score[1])

if __name__ == "__main__":
main()

出力結果

1
2
loss= 0.853970468044281
accuracy= 0.5555555820465088

正解率は55%ちょっととあまりよくありません。。。

手順⑤
手順④で保存したモデルデータを使って、2つの画像を分類してみる。

1
2
3
4
5
6
7
8
9
10
11
12
13
14
15
16
17
18
19
20
21
22
23
24
25
26
27
28
29
30
31
32
33
34
35
36
37
38
39
40
41
42
43
44
45
46
import sys, os
from PIL import Image
import numpy as np

# 検査対象のファイルを指定
lst = ['MIYA19224DSC_0138_TP_V1.jpg', 'mizuho17810DSC_0048_TP_V1.jpg']

image_size = 50
categories = ["あじさい", "ひまわり", "たんぽぽ"]

# 入力画像をNumpyに変換
X = []
files = []
for fname in lst:
img = Image.open(fname)
img = img.convert("RGB")
img = img.resize((image_size, image_size))
in_data = np.asarray(img)
X.append(in_data)
files.append(fname)
X = np.array(X)

# CNNのモデルを構築
model = build_model(X.shape[1:])
model.load_weights("./bunrui/hana.hdf5")

# データを予測
html = ""
pre = model.predict(X)
for i, p in enumerate(pre):
y = p.argmax()
print("+ 入力:", files[i])
print("| 名称:", categories[y])
html += '''
&lt;h3&gt;入力:{0}&lt;/h3&gt;
&lt;img src="{1}"&gt;&lt;br&gt;
名称:{2}
'''.format(os.path.basename(files[i]),
files[i],
categories[y])

# レポートを保存
html = " p { margin:0; padding:0; } " + \
html + ""
with open("result.html", "w") as f:
f.write(html)

結果はresult.htmlに出力される。
出力結果

いちおう分類は成功しているようだ。
画像データを回転させたりすると判定精度があがるようなので次回試してみる。

(Google Colaboratoryで動作確認しています。)