前回読み込んだアイリスデータを参照しk-means法 でクラスタリングを行います。
クラスタ数(グループ数)
k-means法 では、クラスタ数(グループ数)を指定する必要があります。
今回のデータではクラスタ数が3種類(’setosa’、’versicolor’、’virginica’)であることがあらかじめわかっているので問題ありませんが、最適なクラス数は分からないことがほとんどであり、実際の運用や評価を実施して決めることになります。
k-means法
k-means法 は、各データ間での距離をもとにグループを分けていく手法です。
最初に適当なクラスタ(グループ)に分けて、クラスタの平均を用いてうまくデータが分かれるように調整していきます。
k-meansの実行
k-meansを実行します。
k-meansのモデルを生成する際のパラメータは以下の通りです。(2行目)
n_clusters3 を指定。
random_state
init“random” を指定。
あとはfit関数 にデータを渡すだけで、クラスタリングのモデル構築は完了です。(4行目)
[Google Colaboratory]
1 2 3 4 from sklearn.cluster import KMeansmodel = KMeans(n_clusters=3 , random_state=0 , init="random" ) cls_data = df_iris.copy() model.fit(cls_data)
[実行結果]
クラスタの予測結果取得
クラスタの予測結果を取得するソースコードは以下の通りです。
predict関数 で予測結果を取得することができます。
[Google Colaboratory]
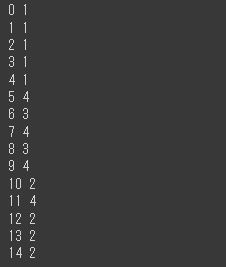
1 2 cluster = model.predict(cls_data) print (cluster)
[実行結果]
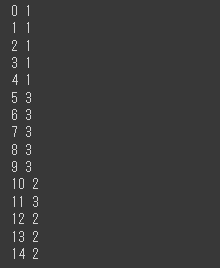
各データに対して0, 1, 2 というようにクラスタリングのクラスタ番号が出力されます。
予測結果をグラフ化
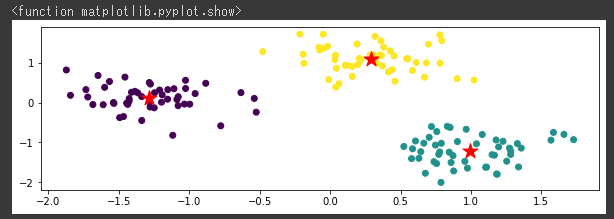
予測した結果をグラフ化します。
[Google Colaboratory]
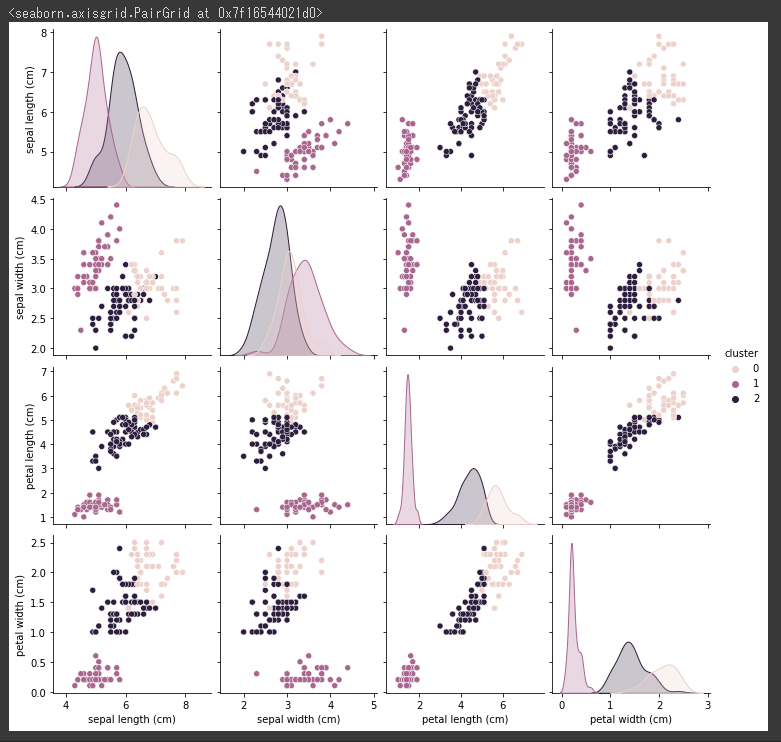
1 2 cls_data["cluster" ] = cluster sns.pairplot(cls_data, hue="cluster" )
[実行結果]
視覚的に3つのクラスタ(グループ)にまとまっていることが分かります。。
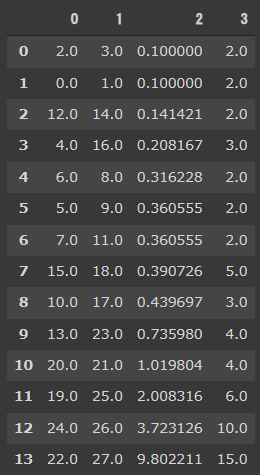
クラスタセンターの取得
model.cluster_centers_ で、それぞれのクラスタの中心を取得することができます。
[Google Colaboratory]
1 2 3 cluster_center = pd.DataFrame(model.cluster_centers_) cluster_center.columns = cls_data.columns[:4 ] display(cluster_center)
[実行結果]
クラスタセンターのグラフ表示
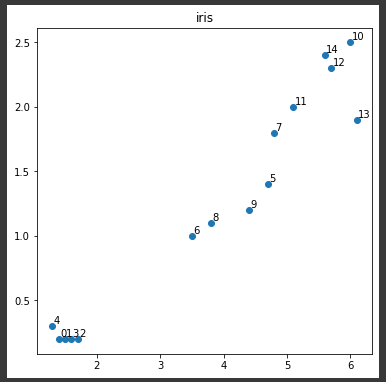
クラスタセンターをグラフに表示してみます。
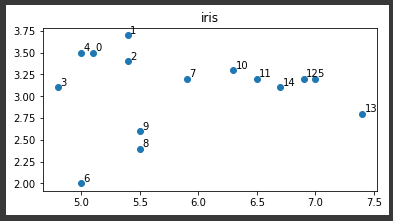
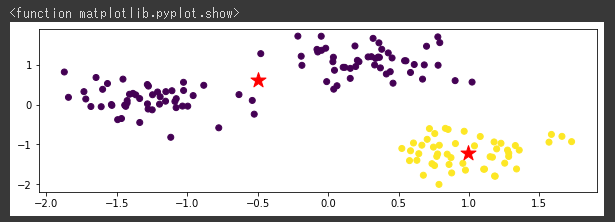
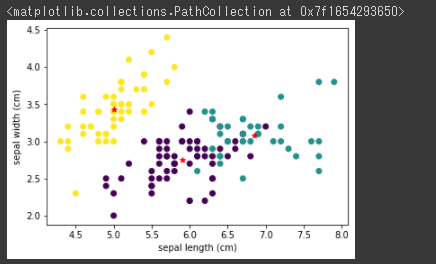
“sepal length”と”sepal width”の2変数に関して、データとクラスタセンターを表示します。
[Google Colaboratory]
1 2 3 4 plt.scatter(cls_data["sepal length (cm)" ], cls_data["sepal width (cm)" ],c=cls_data["cluster" ]) plt.xlabel("sepal length (cm)" ) plt.ylabel("sepal width (cm)" ) plt.scatter(cluster_center["sepal length (cm)" ], cluster_center["sepal width (cm)" ], marker="*" , color="red" )
[実行結果]
赤い★マークで表示されているのが、各クラスタを構成しているクラスターセンターの位置になります。
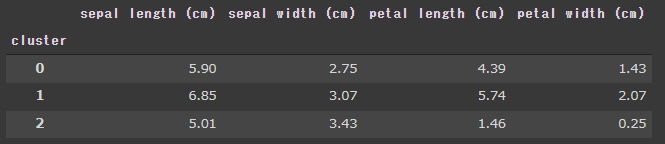
クラスタ番号で集計した説明変数の平均値
クラスタリングの結果を確認します。
クラスタ番号で集計を行い、説明変数の平均を表示します。
[Google Colaboratory]
1 display(cls_data.groupby("cluster" ).mean().round (2 ))
[実行結果]
正解データとの比較
正解データと合わせて、答え合わせを行います。
確認しやすいように花の種類を設定して、花の種類で集計して平均を表示します。
[Google Colaboratory]
1 2 3 4 5 cls_data["target" ] = iris.target cls_data.loc[cls_data["target" ] == 0 , "target" ] = "setosa" cls_data.loc[cls_data["target" ] == 1 , "target" ] = "versicolor" cls_data.loc[cls_data["target" ] == 2 , "target" ] = "virginica" display(cls_data.groupby("target" ).mean().round (2 ))
[実行結果]
cluster列にはクラスタ番号の0, 1, 2 が表示されています。
4つの変数がすべて一致しているsetosa はクラスタ番号2で全て正しくクラスタ化されていることが分かります。
versicolor とvirginica ですが、4つの変数が完全に一致しているわけではありませんが、近い数字にはなっているのでそれなりにクラスタ化されているかと思います。
次回は、調整ランド指数 と正解率 を使ってクラスタリングの結果を評価してみます。